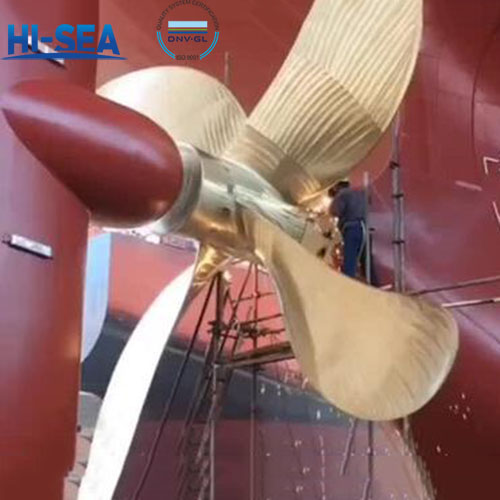
Installation method of marine propeller
There are two ways to install propellers on the shaft, one is key installation, and the other is keyless installation.
With the continuous development of shipbuilding technology, the structure of keyless installation connection between propellers and shafts avoids stress concentration on the shaft caused by machining key slots on the propeller shaft. Therefore, more and more ships are using keyless installation of propellers, gradually replacing key installation. Method for installing propellers using keyless hydraulic couplings.
Overview
There are two ways to install propellers on the shaft, one is key installation, and the other is keyless installation.
With the continuous development of shipbuilding technology, the structure of keyless installation connection between propellers and shafts avoids stress concentration on the shaft caused by machining key slots on the propeller shaft. Therefore, more and more ships are using keyless installation of propellers, gradually replacing key installation. Method for installing propellers using keyless hydraulic couplings. Insert the propeller onto the stern shaft, install the hydraulic nut, and use the high-pressure oil pumped out by the oil pump to enter the conical surface of the stern shaft and propeller through the oil groove in the inner hole of the hub via the high-pressure oil pipe, causing the hub to undergo elastic deformation and expand. At the same time, high-pressure oil is supplied to the hydraulic nut, which generates forward thrust, causing the propeller to move forward. When the propeller is pushed to the designated position, first release the high-pressure oil from the hub taper hole, and then release the high-pressure oil from the hydraulic nut. Due to the recovery of the elastic deformation of the hub, the propeller is tightly fitted onto the stern shaft.
The installation method of marine propellers is usually divided into the following steps:
Preparation: Ensure the compatibility between the propeller and the axis, clean the surfaces of the propeller and axis, and check if the installation holes of the propeller and axis are aligned. Prepare the necessary tools and equipment, such as wrenches, jacks, cranes, centering instruments, torque wrenches, etc.
Check the propeller and shaft: Ensure that the propeller is not damaged or deformed, the blades are balanced, and there are no cracks. Check the straightness and surface condition of the propeller shaft to ensure there is no wear or damage.
Installing propeller: Align the propeller shaft hole with the axis, fix the propeller on the axis with bolts, and pay attention to tightening the bolts evenly to ensure that the propeller is installed firmly.
Adjust propeller position: According to the design requirements and actual situation of the ship, adjust the position of the propeller to ensure that the gap between the propeller and the hull meets the requirements.
Fixed propeller: Install the nut and washer onto the end of the shaft and tighten them by hand. Use a torque wrench to tighten the nut according to the specified torque value, ensuring that the propeller is firmly fixed.
Install locking device: If there is a locking device, such as a split pin or locking nut, make sure it is installed in place to prevent the nut from loosening.
Alignment adjustment: ① Alignment propeller: Use an alignment instrument to check the alignment of the propeller and shaft, ensuring that there is no eccentricity or shaking when the propeller rotates. ② Adjust clearance: If necessary, adjust the clearance between the bearings and seals to ensure smooth operation.
Check propeller installation: After installation, ensure that all nuts, bolts, and locking devices are securely installed. Perform a rotation test on the propeller to check for any abnormal sounds or vibrations, ensuring proper installation of the propeller.
For more marine propeller information, kindly please click here.

